Creating realistic atmospheric fog effects can elevate your video projects to a cinematic level. In this detailed guide, based on a tutorial by Josh Bailey on his youtube channel Obscurity, you’ll learn how to craft professional-grade fog VFX using Adobe After Effects or DaVinci Resolve Studio.
Why Fog VFX Matters in Cinematic Projects
Atmospheric fog isn’t just about adding mood; it enhances depth, realism, and the overall storytelling in your visuals. Whether you're working on a short film or a blockbuster, mastering fog effects can bring your 3D renders and compositions to life.
Tools and Materials Required
To recreate cinematic fog effects, you'll need:
- Software Options:
- DaVinci Resolve Studio: Known for its robust depth map generation and color grading tools.
- Adobe After Effects: Popular for its advanced compositing capabilities.
- Footage Essentials:
- Clean Plate: A background shot without the actor. If you don’t have one, use Photoshop’s generative fill to create it.
- Actor Footage: Ideally shot against a blue or green screen for easier keying. If a blue/green screen isn’t available, rotoscoping can work with mixed results.
- Depth Map:
- A black-and-white map that determines where fog should appear, based on distance from the camera.
- Optional Plugin: Dehancer can take your color grading to the next level for a truly cinematic finish.
Josh’s Tip: While both After Effects and Resolve can handle this effect independently, combining their strengths can yield the best results.
Key Steps in Creating Fog VFX
1. Keying Your Actor
Removing the background from your footage is the first step. This isolates your actor and sets the stage for compositing the fog.
In DaVinci Resolve:
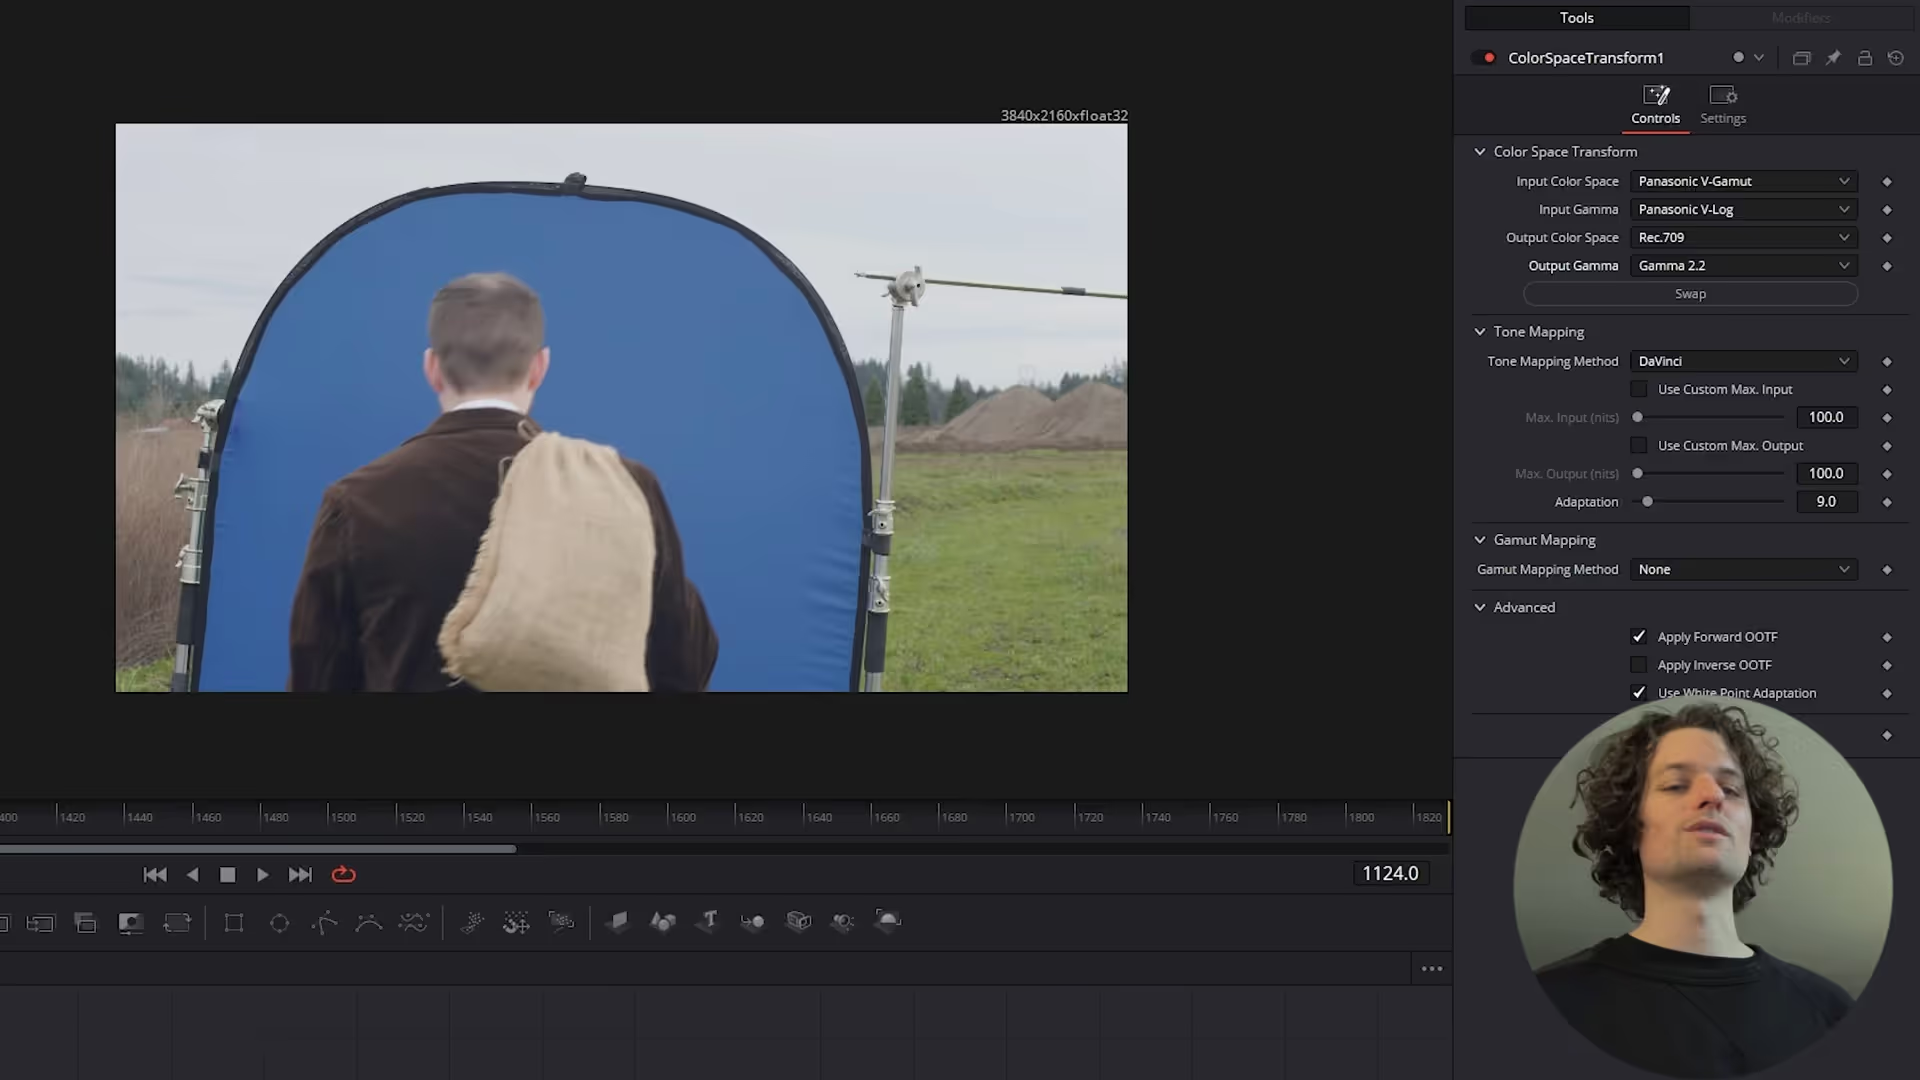
- Color Space Conversion:
- Use the Color Space Transform node to convert footage shot in log format (e.g., Panasonic V-Log) to Rec.709. This enhances contrast and makes keying easier.
- Delta Keyer:
- Apply the Delta Keyer to remove the background. Adjust the threshold settings to achieve clean separation between the actor and the blue/green screen.
- Garbage Matte:
- Use the polygon tool to mask out unwanted areas of the frame for a cleaner composite.
In After Effects:
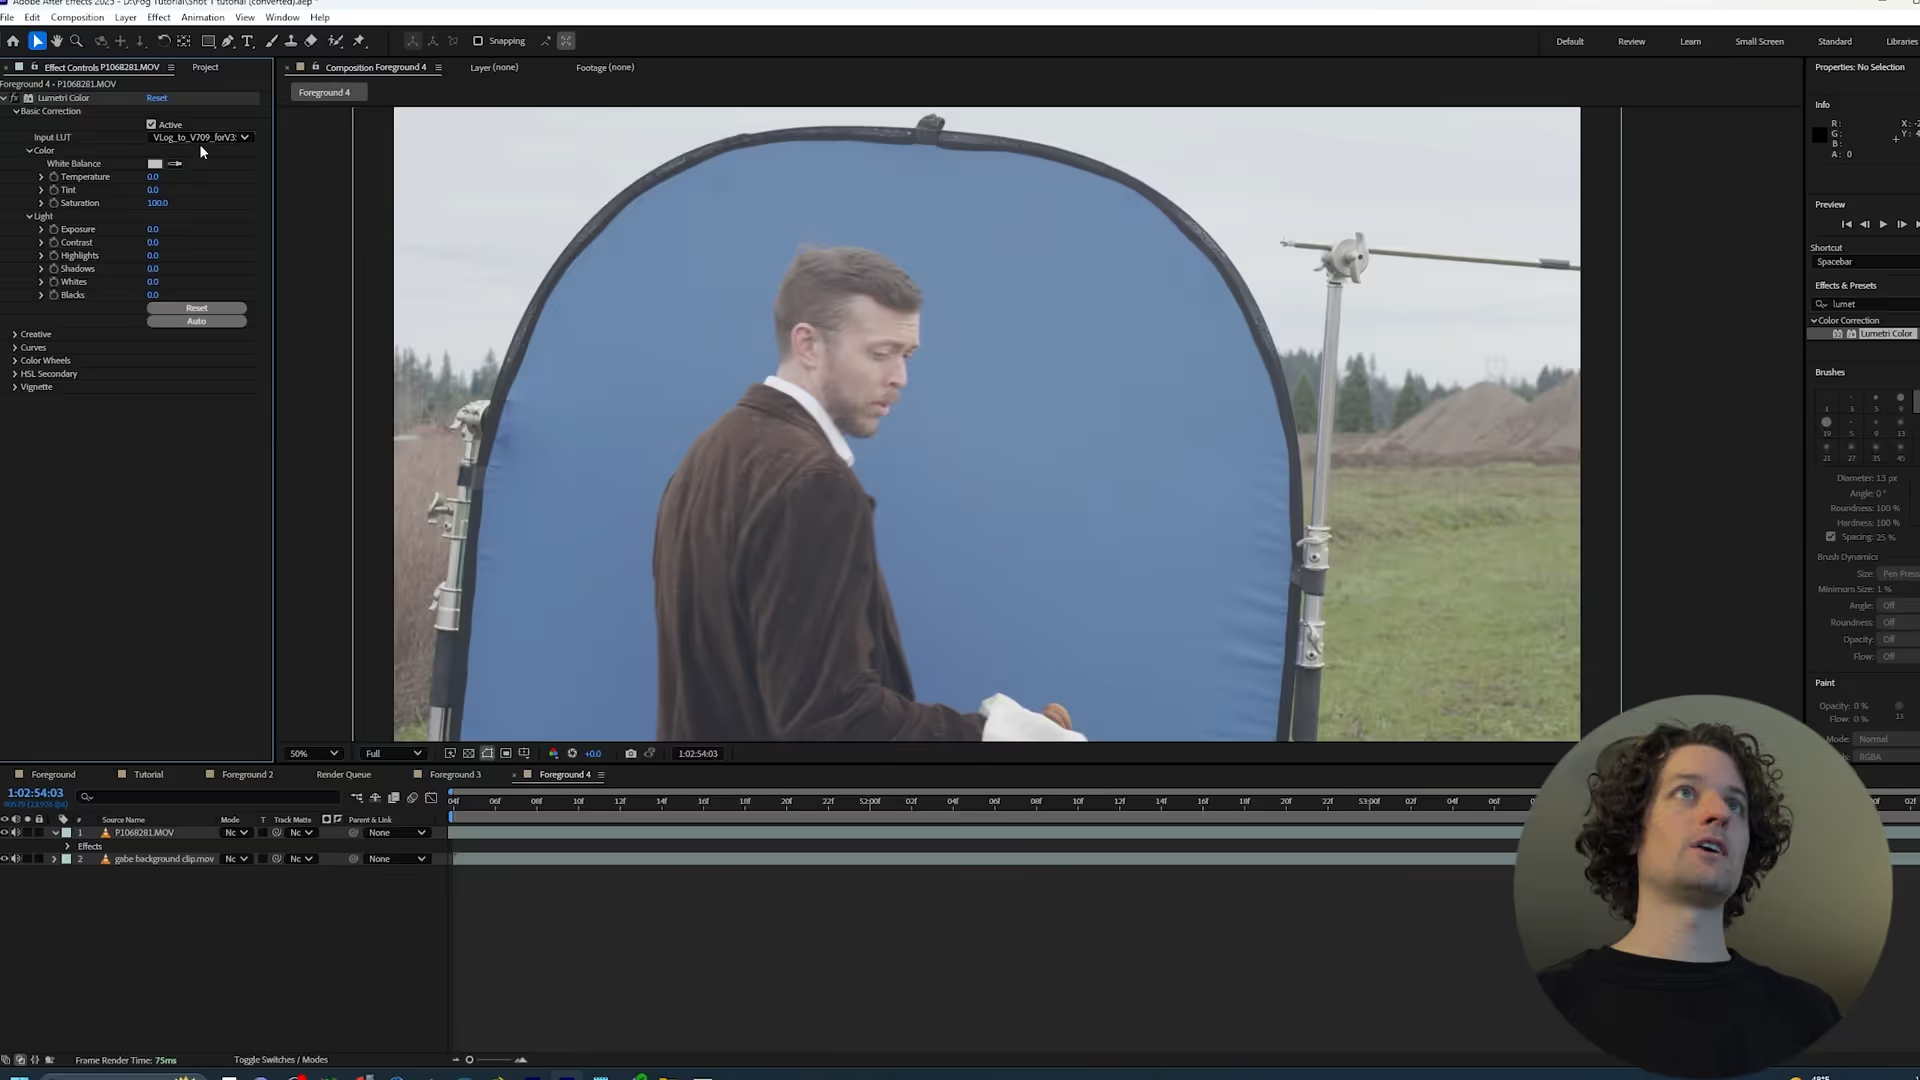
- Lumetri Color:
- Add a LUT or use Lumetri Color to convert footage to Rec.709 for better color balance.
- Keylight Plugin:
- Use the Keylight effect to remove the background. Adjust the “Screen Matte” settings to fine-tune transparency and edges.
- Garbage Matte:
- Draw a mask around the actor to eliminate unnecessary areas outside the subject.
Pro Tip: Ensure your keying preserves edge detail, especially around hair and semi-transparent objects, for a polished result.
2. Generating a Depth Map
Depth maps are essential for achieving realistic fog that interacts dynamically with the scene. They define where the fog should be dense or sparse, based on distance.
In DaVinci Resolve:
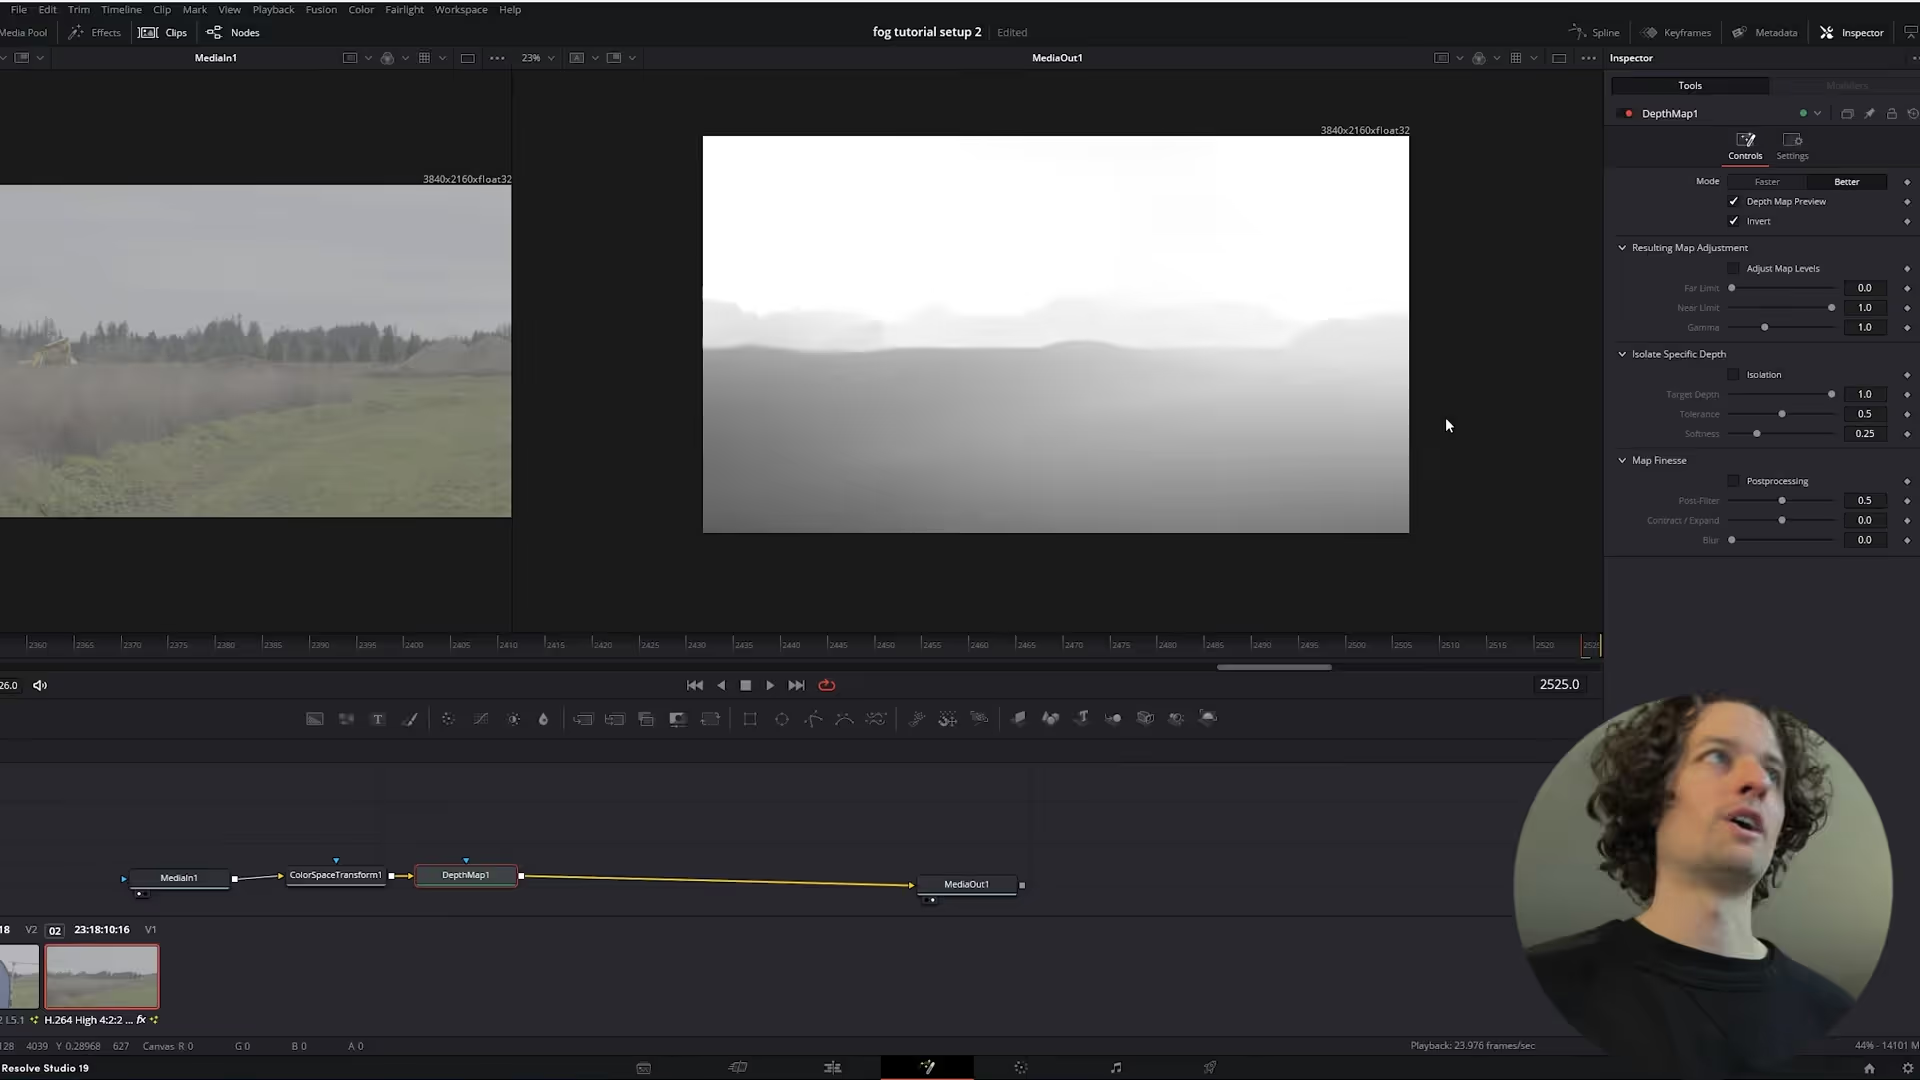
- Fusion Tab:
- Import your clean plate into the Fusion workspace.
- Add Depth Map Node:
- Generate a depth map by adjusting the near and far limits. The “near limit” controls fog density close to the camera, while the “far limit” manages fog in the background.
- Tweak and Export:
- Fine-tune the depth map until it accurately reflects the spatial structure of your scene. Export it as a PNG for use in compositing.
In Photoshop:
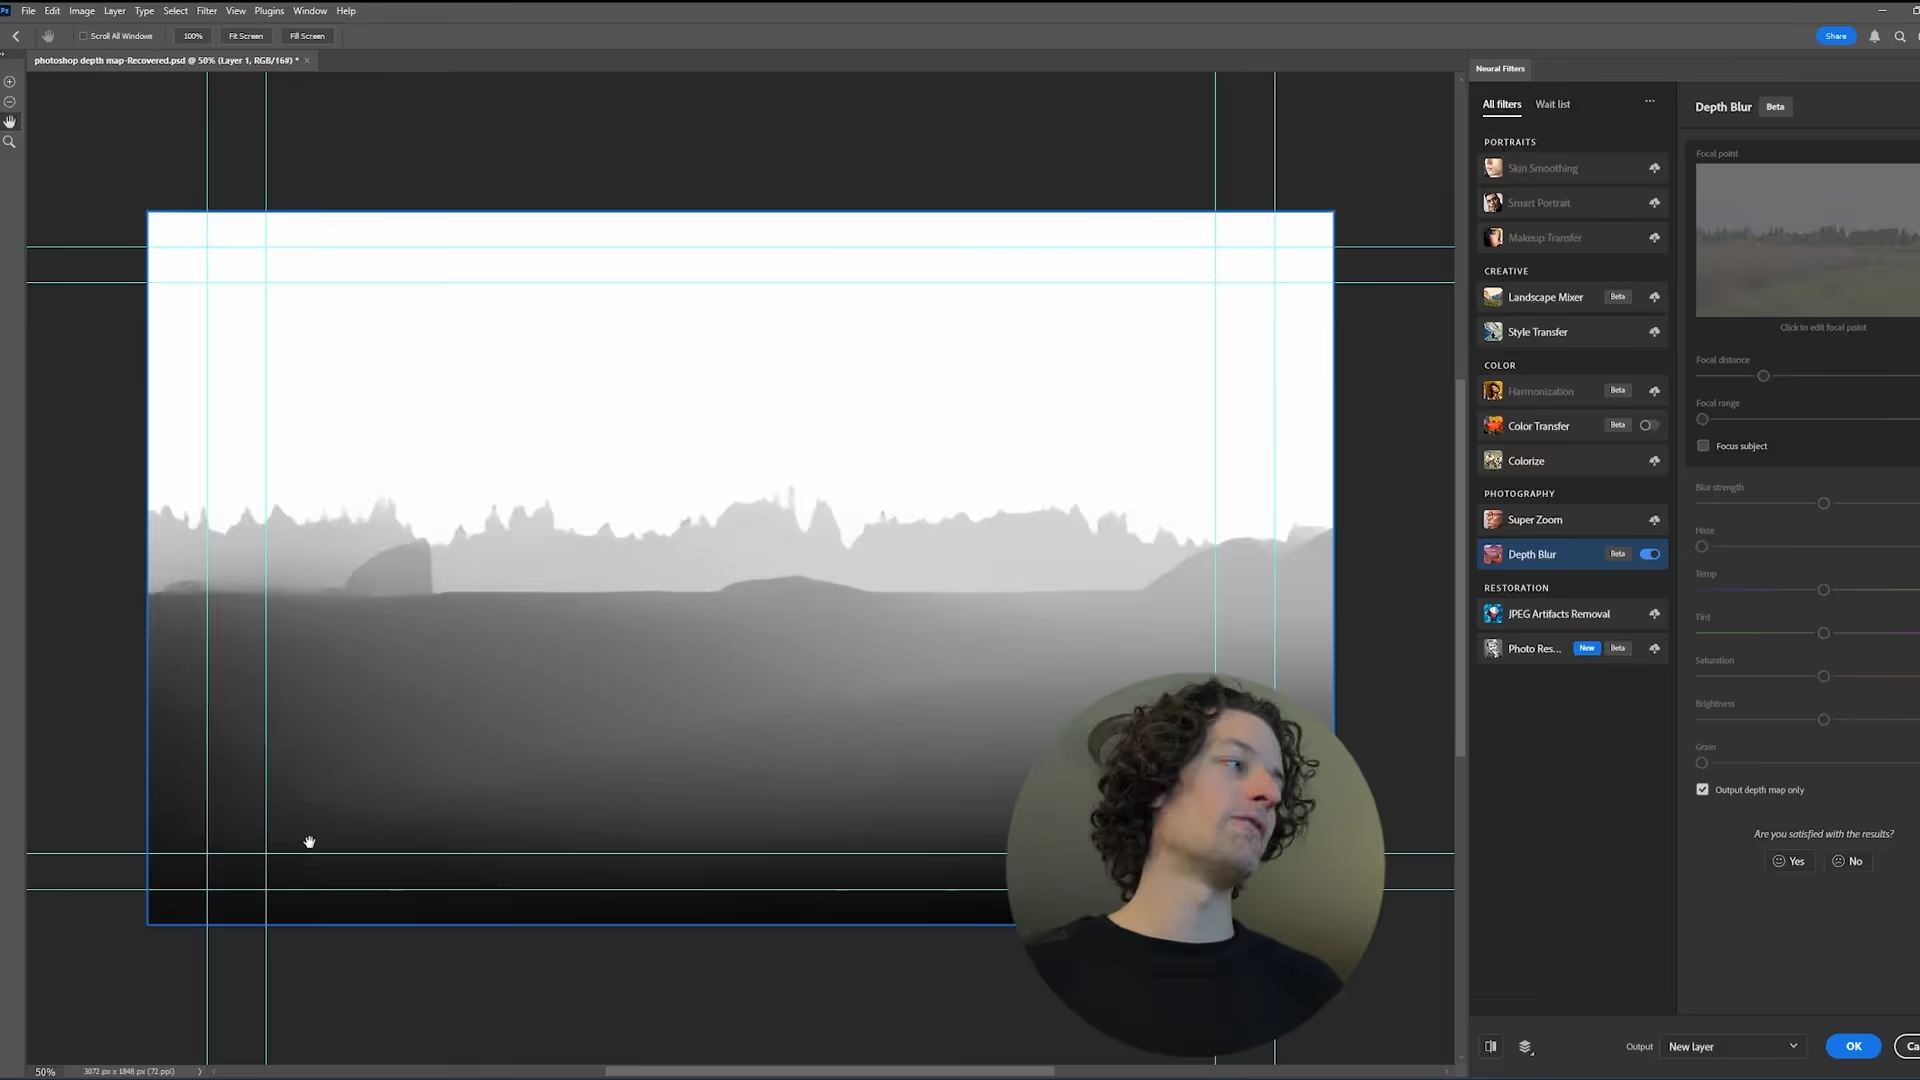
If Resolve isn’t available, you can create a depth map manually:
- Open your clean plate in Photoshop.
- Use gradients and brushes to paint black-and-white areas, with white representing closer objects and black for distant ones.
- Save the file as a PNG.
Josh’s Advice: Resolve’s depth map node allows for more control, making it the preferred tool for this step.
3. Compositing Fog Effects
With your keyed actor and depth map ready, the next step is combining them to create the final fog effect.
In DaVinci Resolve:
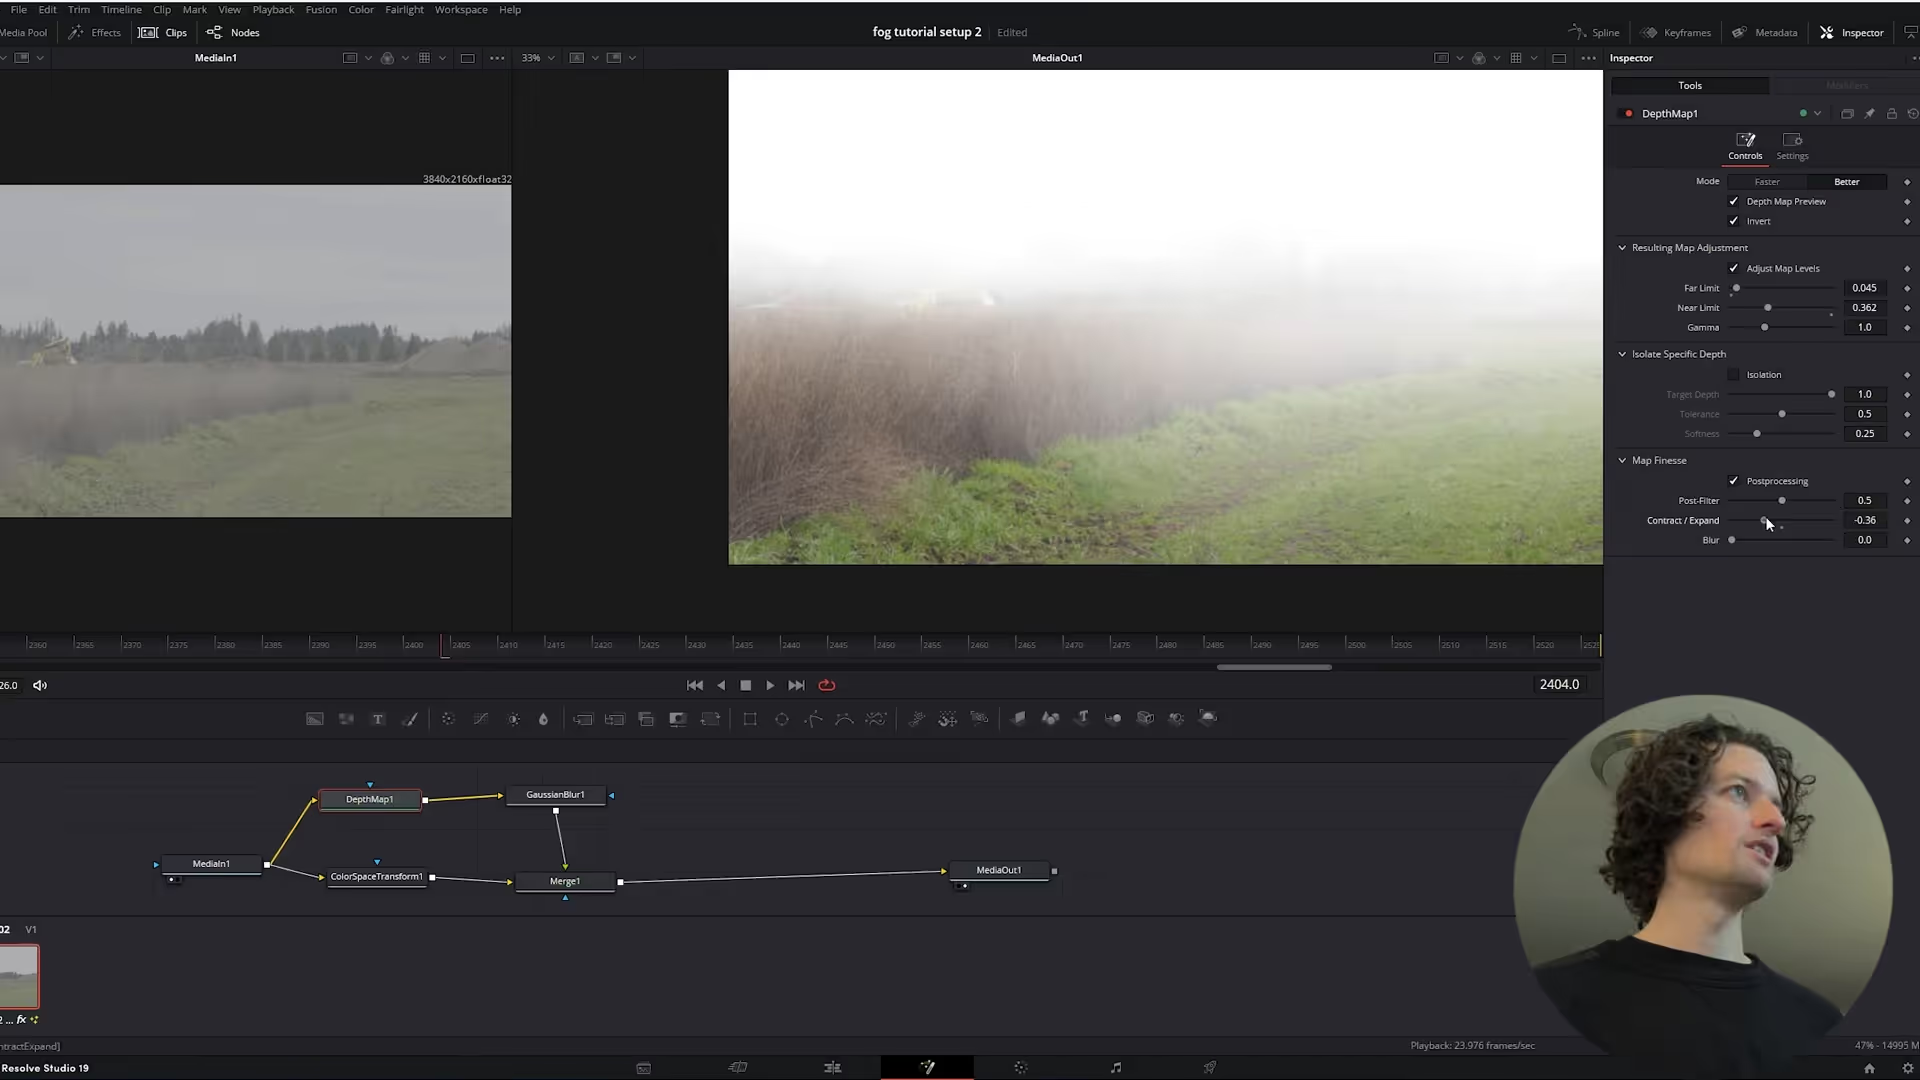
- Merge Nodes:
- Use the Merge node to combine the actor footage, clean plate, and depth map.
- Apply Screen Mode:
- Set the depth map layer to “screen” mode to blend it naturally into the scene.
- Adjust Parameters:
- Refine the fog distribution by tweaking the near and far limits in the depth map node. Use Gaussian blur to soften the fog for added realism.
In After Effects:
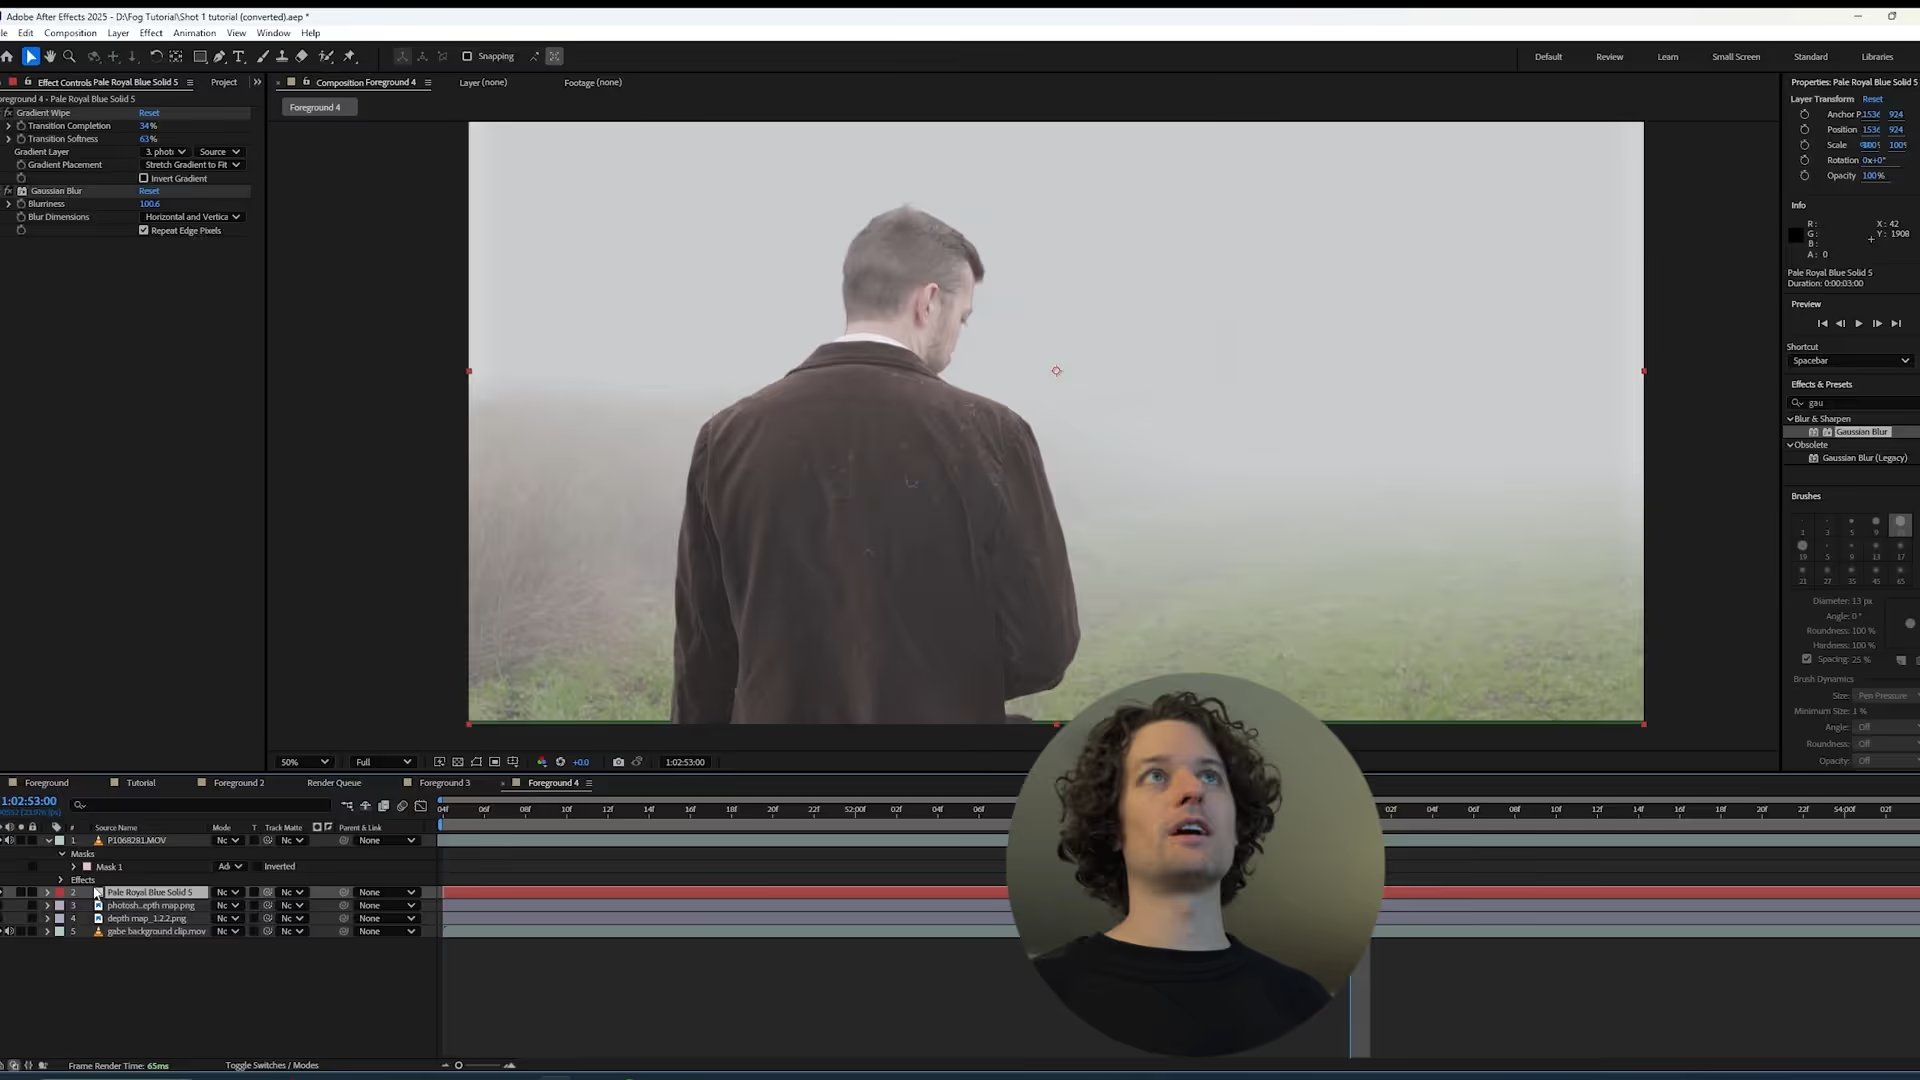
- Import Depth Map:
- Add the exported depth map as a layer in your composition.
- Blend Fog:
- Set the fog layer to “screen” or “lighten” blend mode. Adjust opacity to control intensity.
- Blur for Realism:
- Apply Gaussian blur to the fog layer to eliminate harsh edges and integrate it seamlessly with the scene.
Pro Tip: Experiment with multiple fog layers at varying opacities to create depth and complexity.
4. Color Grading and Final Touches
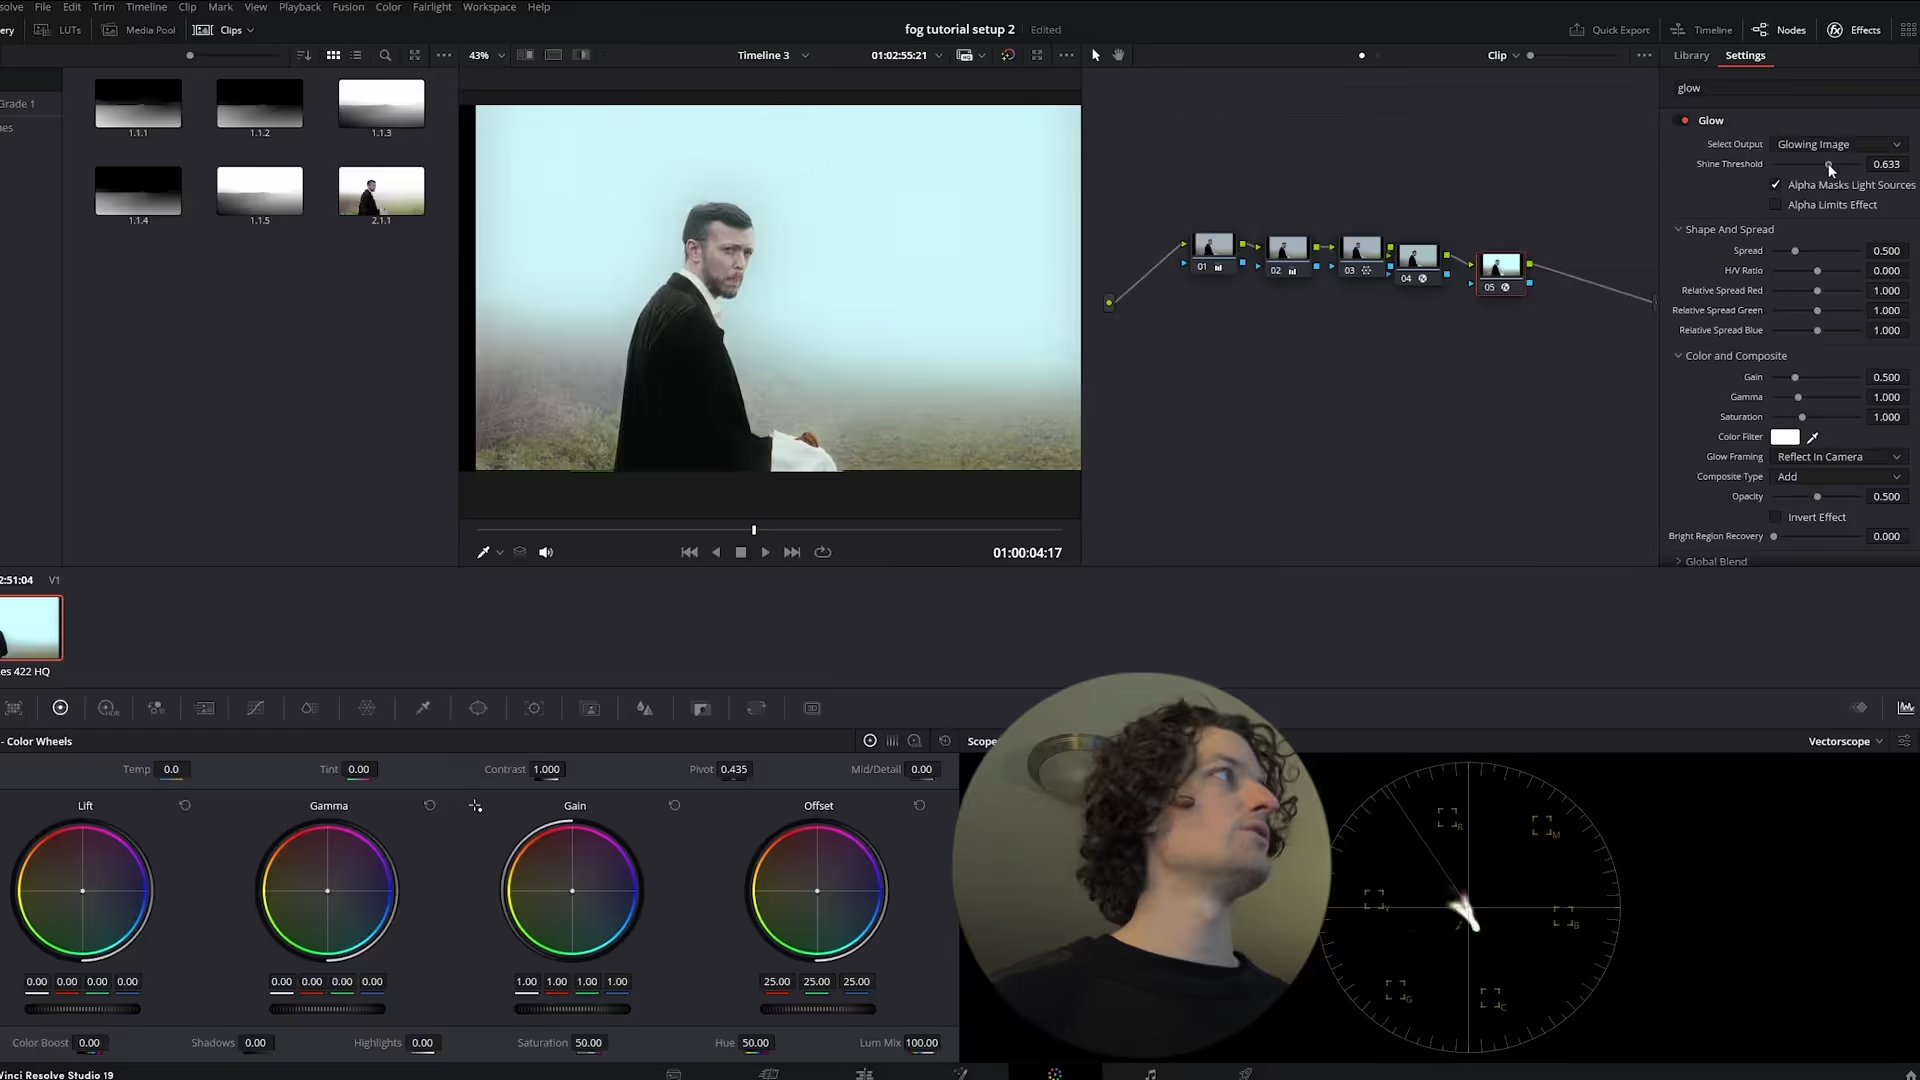
Color grading ensures the fog effect blends seamlessly with the rest of the scene. Bailey recommends:
- Use Dehancer:
- This plugin offers film-like color grading options, including grain, halation, and bloom effects.
- Match Lighting:
- Adjust fog color and brightness to match the lighting direction and intensity in your scene.
- Refine Edges:
- Soften edges where the fog meets objects for a natural transition.
Josh’s Advice: Less is often more with fog. Aim for subtlety to avoid overpowering the scene.
Pro Tips for Realistic Fog
- Keep It Subtle: Fog should enhance your scene, not dominate it.
- Layer for Depth: Use multiple layers with different opacities and blur levels for a realistic effect.
- Match Scene Lighting: Fog must follow the light direction and intensity for visual consistency.
- Add Motion Blur: If your scene has moving elements, add motion blur to the fog for added realism.
Final Thoughts
Josh Bailey’s tutorial provides a comprehensive approach to creating cinematic fog effects, whether you’re working in DaVinci Resolve Studio or After Effects.
Start experimenting today, and take your VFX skills to the next level!
Follow us on Instagram and twitter for regular updates and more content.
.png)


.jpg)
.jpg)


